Build a CardApp from Scratch
What this doc solves
The CardApp Studio page describes Studio's capabilities. This one walks through a complete character card to show how to direct it in plain language.
By the end you'll have a runnable, immersive RP CardApp built from scratch, without writing a single line of JavaScript yourself.
What you'll get
The final result is a single-character immersive RP card called "Isekai Survival Log". Once you send the first message, you'll see this:
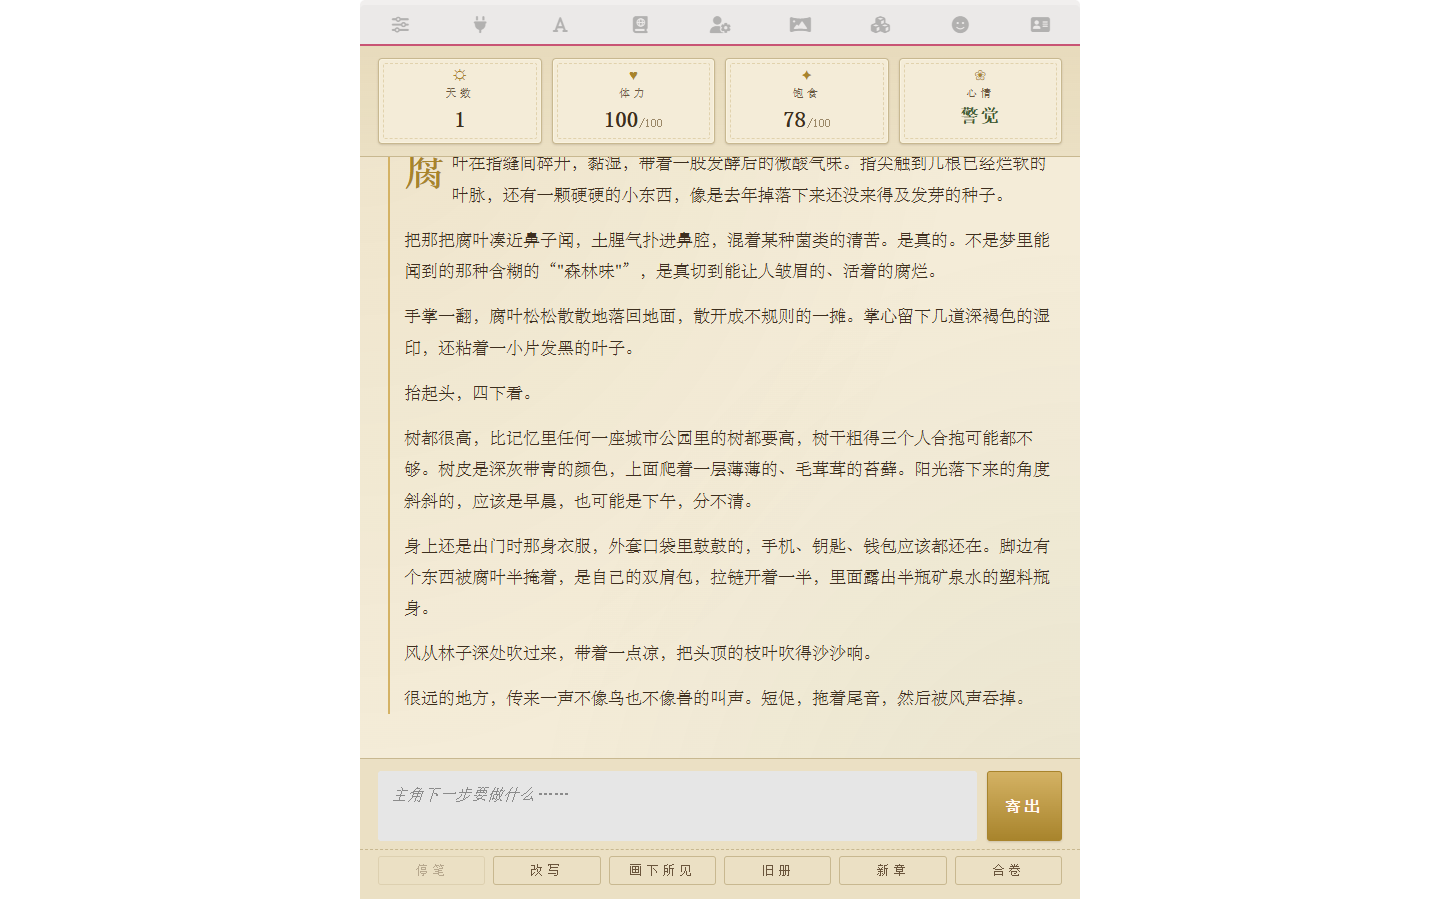
- A 4-cell status bar at the top: Day / Stamina / Hunger / Mood
- The protagonist arrives in an unfamiliar forest in a Western low-magic isekai setting; the AI plays the environment and narrator
- A bound World Info book containing state-injection entries + worldview anchors + a few NPC settings
- Immersive button labels (Halt / Rewrite / Old Volume / New Chapter / Close Volume) covering the required UX
The whole process only requires you to describe what you want in natural language — the AI handles code, Git commits, World Info entries, variable initialization, and field bindings.
Prerequisites
- A working Luker / SillyTavern instance
- A configured LLM API; a model with strong tool-call support is recommended (Claude / GPT-5 etc.)
- (For the advanced section) A working Stable Diffusion / ComfyUI backend
1. Create an empty card → Open Studio
Open the right-side character management panel, click "New Character", and pick a name (this guide uses "Isekai Survival Log"). You don't need to fill any fields — description, first message, World Info bindings are all left for Studio AI to handle.
Next, open "Extensions" → expand "Character Card Editor Assistant" → click "</> CardApp Studio":

Studio is the three-panel overlay on top of the main UI: AI chat on the left, live preview in the middle, code editor on the right. The new card hasn't enabled CardApp yet, and Studio will proactively ask if you want to enable it — that's expected.

You don't need to read code to follow this
The right panel will refresh as the AI works, but this guide doesn't ask you to read the code. Just watch the left chat and the center preview — that's how vibe-coding is supposed to feel.
2. One prompt, scaffolding + World Info + opening message all at once
Click into the left input field and paste the following verbatim:
I want to build a light-novel-style Western isekai adventure card.
The protagonist is dropped into an unfamiliar forest and has to survive alone.
The AI plays the environment and narrator (third-person view describing what
the protagonist sees / feels). Avoid Eastern xianxia / cultivation / urban /
school settings, and avoid post-apocalyptic dark fantasy.

Build a minimal viable CardApp first:
- A 4-cell status bar at the top: Day, Stamina, Hunger, Mood
- A message rendering area in the middle
- An input box and a send button below
- The required quick buttons (stop generation, switch chat, new save, close chat)
  at the bottom

All state variables use the isj_ prefix (isj_day / isj_hp / isj_food / isj_mood).
Style should match a light-novel Western isekai vibe; you decide the specific
colors / fonts / layout.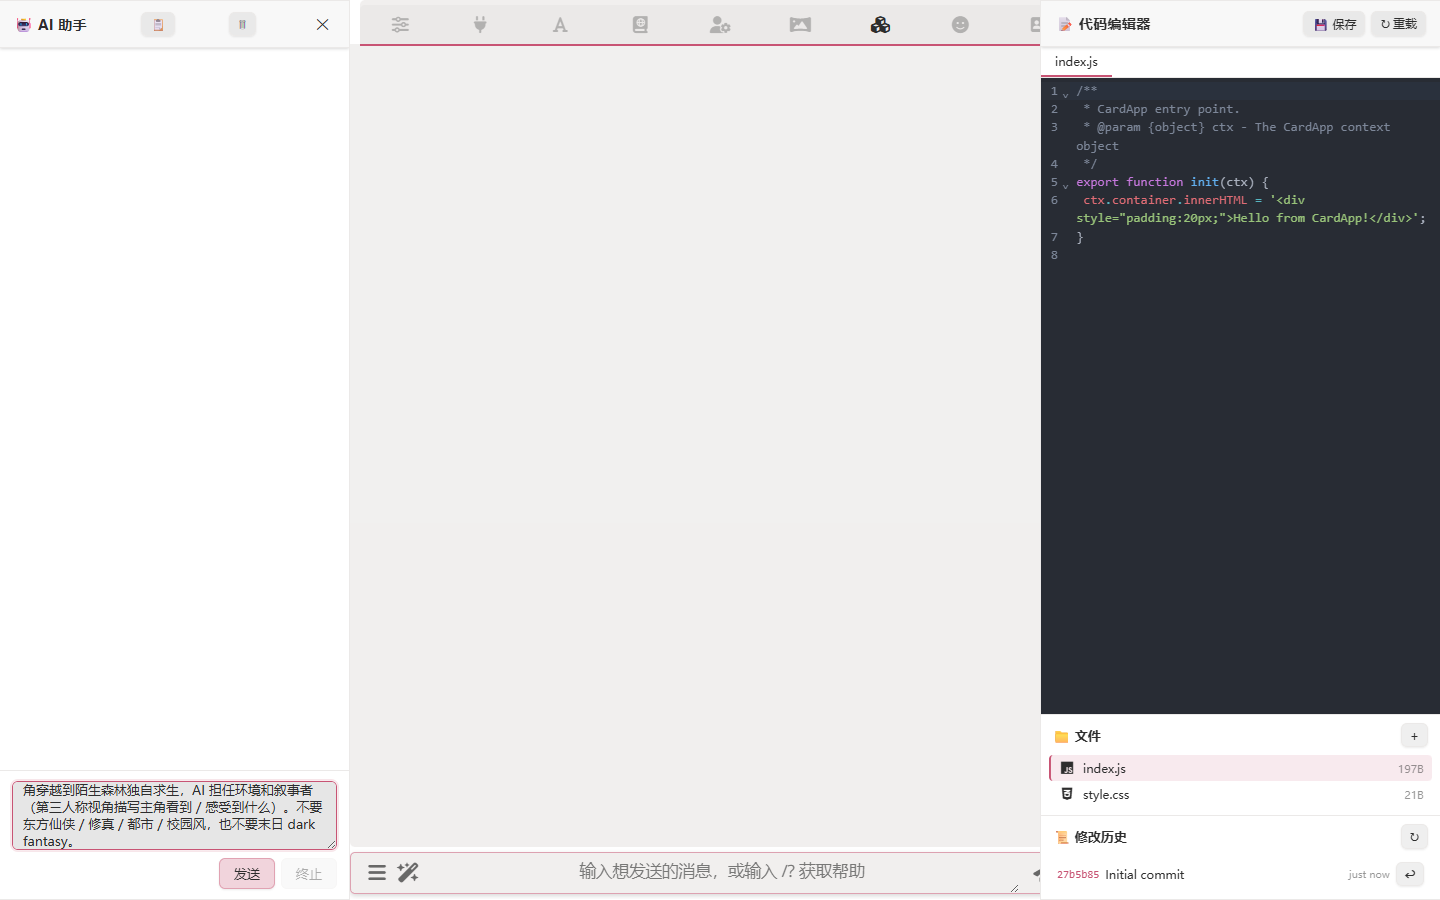
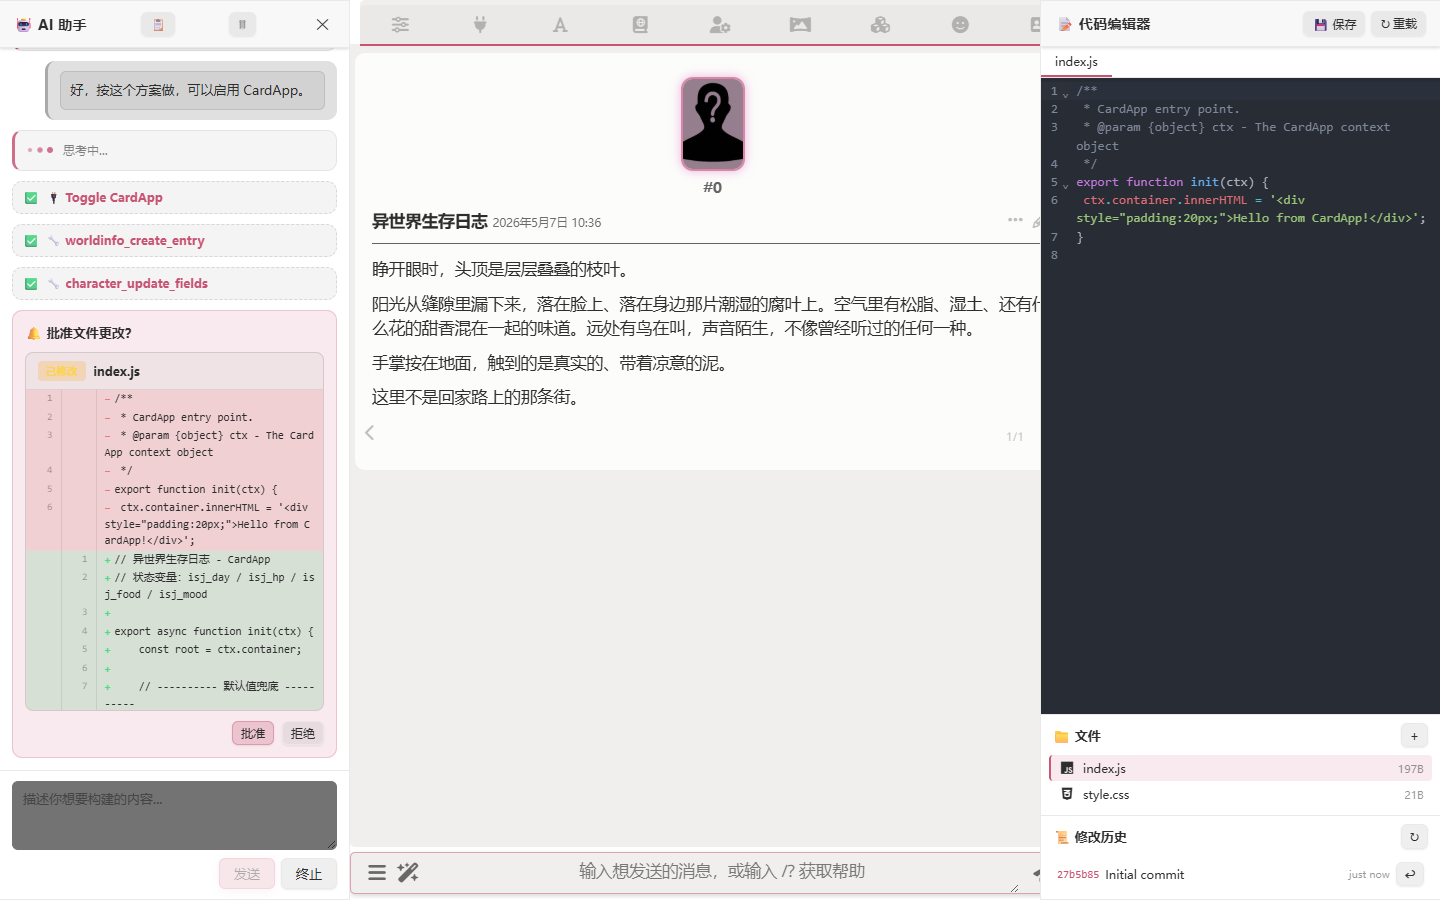
After you send, Studio AI doesn't dive straight into writing — it first:
- Calls
list_files/character_get_fieldsto inspect the current state - Notices CardApp isn't enabled yet, asks you whether to enable it (a "yes" is enough)
- Walks through its plan so you can review it
Once confirmed, it does the following in one go — no need to split prompts across rounds:
- Enables the CardApp toggle (
cardapp_set_enabled) - Writes
index.js/style.css(status bar / message area / input area / required UX buttons) - Binds a paired World Info book and creates state-injection entries + worldview anchors
- Rewrites
first_mes(the protagonist's transition opening, withsetvarcalls to initialize variables) - Binds the
worldfield to the new World Info book
Each tool call prompts you for approval with a diff — usually safe to "Approve all" in one click.
"AI content goes into World Info, not system_prompt"
Notice the AI doesn't touch system_prompt — this is Luker's CardApp authoring convention: a card's system_prompt overrides the system section your chat-completion preset already designed, so card content needs to live in World Info entries to coexist with the preset. Studio AI follows this by default.
Don't be surprised to see {{...}} in entries
The AI teaches the model how to use macros like setvar / addvar inside entries — those teaching examples must be backslash-escaped ({{...}}), otherwise the engine executes them on every prompt build and pollutes your variables. Studio AI handles this escaping automatically.
When the AI finishes, the center preview area auto-reloads and you see a runnable CardApp:
3. If something's off, just ask the AI
After one round you might decide you want a different palette, a different button order, a different vibe in the AI's narration, or a richer NPC setting — just say so in the left chat. Studio AI continues with the existing context:
Just ask freely
- "Reorder the bottom buttons to Send / Rewrite / Old Volume / New Chapter / Close Volume"
- "Can the status bar font be a bit larger?"
- "On that NPC keyed entry, hint that the player can give them gifts"
- "The end of the opening message feels too cold; try a brighter scene"
Don't worry about prompt phrasing — describe what you want and the AI will iterate. If the result is wrong, just keep iterating.
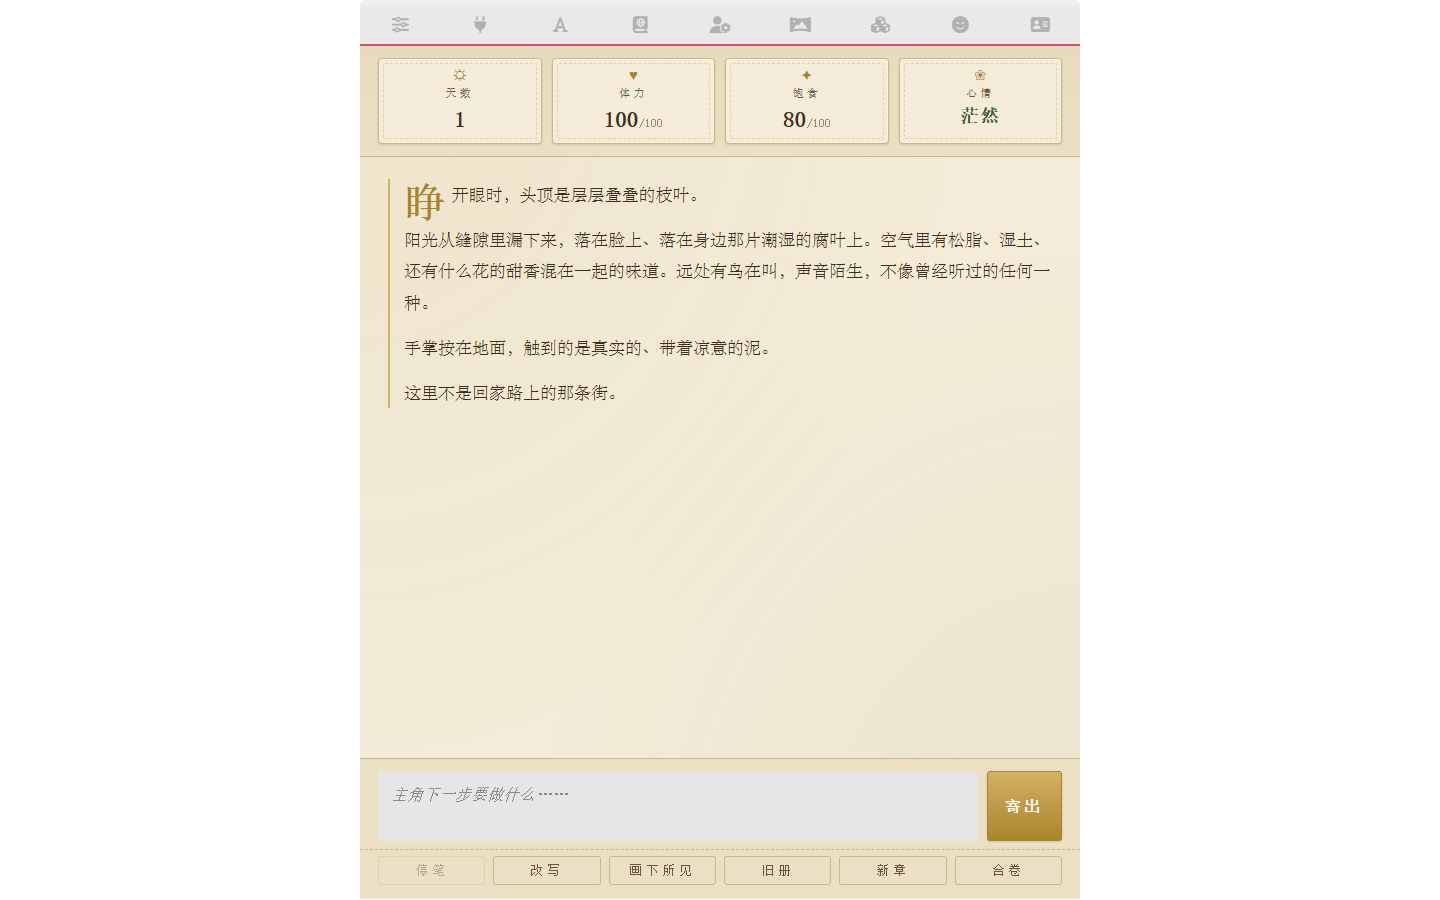
4. End-to-end run
Send an RP message (anything will do):
By this point, with 1–2 natural-language conversations, you've produced a card that has:
- ✓ A working frontend UI (status bar + required UX buttons)
- ✓ Worldview and NPC settings (the bound World Info book)
- ✓ An opening message with initialization logic
- ✓ Real RP immersion when running
Throughout this process you never read a line of code, never manually toggled CardApp, never manually created a World Info entry.
5. (Advanced) Wire up image generation
Prerequisite: SD/ComfyUI backend
This section requires the SillyTavern Image Generation extension backend (local Stable Diffusion / ComfyUI / remote API — pick one). Without a backend, skip this section.
I'd like the CardApp to auto-generate images when the AI describes a new scene.
Don't generate images for player-only dialog or inner monologue.
Also add a "Draw what's visible" button at the bottom that re-renders the
scene of the most recent AI message on demand.

For users without an image-generation backend: silently skip / hide the button,
don't surface errors, and don't break other CardApp features.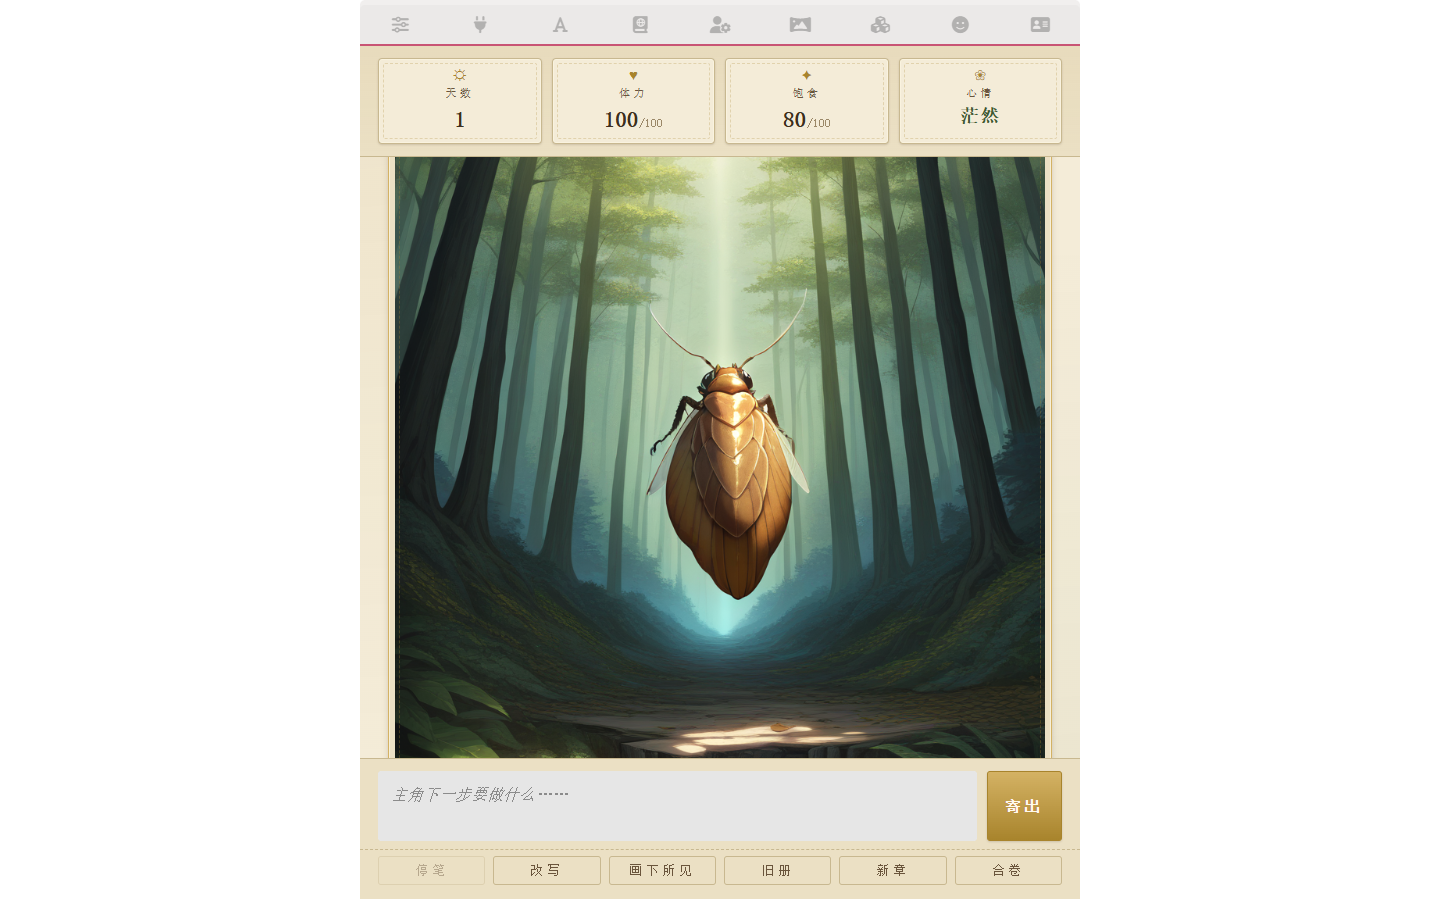
Prompting cheatsheet
After running through one cycle you'll notice that effective Studio prompts don't need to be long — what matters is making the direction clear. A few learnings:
Describe appearance and behavior, not implementation
- ✓ "A 4-cell status bar at the top: Day / Stamina / Hunger / Mood"
- ✗ "Use ctx.registerRenderer to register a renderer that listens for GENERATION_ENDED"
Separate constraints from latitude
- "Use the isj_ prefix" is a constraint (direction)
- "You decide the colors / fonts / layout" is latitude (left to the AI)
- The AI fills in latitude with concrete content (NPC names, palette, button labels) and treats constraints as inviolable — this is the workflow it's best at
AI output not matching your idea is not a bug
- It's part of the loop. When you see drift, describe the gap precisely: "I wanted X (be specific); you gave me something closer to Y (point out where it drifted); fix it."
- Don't go back and edit files yourself, and don't rewrite the entire prompt
Look at the diff before approving
- Every tool call pops up an approval; that's your safety net when something actually goes wrong
- But default to trusting Studio — its system prompt already bakes in Required UX, op-log usage, World Info binding, and macro escaping
Ask for explanations when in doubt
- "Why does this need
{{...}}instead of{{...}}?" - It'll explain in plain language and walk you through the context
- "Why does this need
Next steps
- CardApp Overview — CardApp's core concepts
- Card Developer Guide — Full
ctxAPI + authoring conventions - Variable Op-Log — How macros like
{{setvar}}work - State System — Floor State / triggers / global variables
- Studio Capability Reference — Editor, Git, AI tools at a glance